Outdoor kitchen with BBQ, sink, and dining table for entertaining guests.

How to Create an Outdoor Space on a Budget

Creating an inviting outdoor living area on a budget comes down to sequencing: establish your functional foundation—a stable ground surface, comfortable seating, and adequate shade—before investing in decorative accents. By choosing resilient materials and phasing the project over several months, you can create a high-functioning courtyard, patio, or backyard zone without overspending or sacrificing durability.

Prioritise Your Spend: The High-Impact Outdoor Budget Framework

Budget alfresco projects often fail when homeowners spend money on decorative accessories before resolving primary spatial problems. An uncomfortable chair on an uneven, weed-strewn lawn under direct afternoon sun will rarely be used, regardless of how many string lights hang above it.

To maximise every dollar, allocate your funds across three core tiers:

  • The Foundation (Roughly 50% of budget): Ground preparation, weed barriers, and stable surfacing. Without a level, dry, and clean footprint, outdoor furniture degrades faster and the space feels uninviting.
  • Usability and Comfort (Roughly 35% of budget): Ergonomic seating and reliable sun/rain protection. If you cannot sit comfortably during midday heat or light drizzle, the space loses its utility for most of the year.
  • Atmosphere and Accents (Roughly 15% of budget): Lighting, outdoor rugs, planters, and decorative items. These can be added gradually or sourced second-hand once the primary zones are functional.

If your budget is tight, plan the space in distinct phases. Phase one establishes the perimeter, ground cover, and basic layout. Phase two introduces permanent or semi-permanent shade and main seating. Phase three completes the cooking zone, ambient lighting, and boundary planting.

Budget Ground Covers: Comparing Gravel, Pavers, and Mulch

Poured concrete slabs and custom timber decking represent significant expenses in outdoor renovations. For cost-conscious projects, unbonded and semi-bonded alternatives provide excellent drainage, lower material costs, and straightforward DIY installation.

Material Durability & Stability Drainage & Weeding Best Used For
Crushed Gravel / Decomposed Granite High; packs down firmly over a compacted roadbase sub-layer to support table and chair legs without sinking. Excellent natural drainage; requires commercial-grade geotextile fabric beneath to suppress weeds. High-traffic seating areas, fire pit surrounds, and defined dining spaces.
Stepping Pavers in Infill Medium to high; large-format concrete pavers provide flat footpaths, while gravel infill absorbs run-off. Permeable; requires occasional raking to keep infill level with paver surfaces. Walkways, transitional zones, and smaller courtyard dining nooks.
Organic Bark or Wood Mulch Low; shifts underfoot, unstable for standard dining chair legs, and breaks down over 12–24 months. Retains soil moisture well; degrades into soil and needs regular seasonal top-ups. Garden borders, low-traffic peripheral beds, and tree surrounds (not dining zones).

For a durable seating area, a compacted crushed stone or gravel base paired with a sturdy metal or timber border offers the best balance of cost, longevity, and ease of installation.

Durable Shade on a Shoestring

An outdoor area without sun protection remains unusable for large portions of the day, particularly during high-temperature months. You do not need an engineered insulated roof to make the area comfortable.

Cost-effective shade options include:

  • High-Density Polyethylene (HDPE) Shade Sails: Commercial-grade shade sails offer strong UV blocking and wind resistance at a fraction of the cost of a fixed verandah. Ensure your mounting points (wall brackets or structural posts set in concrete) are sturdy enough to handle high wind loads and seasonal tension adjustments.
  • Freestanding Cantilever or Market Umbrellas: Ideal for renters or those who need flexible shade that tracks with the sun. Prioritise umbrellas with heavy concrete or water-fillable bases and solution-dyed fabric canopies that resist UV fading.
  • Trellis Framework with Deciduous Climbers: A simple timber or wire trellis planted with vigorous climbers (such as ornamental grape or wisteria) provides dense, cooling shade during summer while dropping leaves in winter to let warming sunlight through.

Material Longevity: Budget Choices That Save Money Long-Term

The biggest hidden trap in budget outdoor design is the “false economy”—buying items that look good initially but disintegrate after one season exposed to rain, UV radiation, and temperature swings. Replacing cheap items every two years quickly outpaces the cost of durable mid-range solutions.

When selecting materials on a budget, keep these principles in mind:

  • Hardware and Fixings: Always use galvanised or marine-grade (304/316) stainless steel screws and brackets. Standard zinc-plated or carbon steel screws will rust quickly when exposed to moisture, staining timber and compromising structural joints.
  • Timber Selection: Untreated softwood (such as standard packaging pine or raw pallets) rots rapidly when in contact with damp ground and attracts wood-boring insects. If using timber outdoors, opt for treated pine (H3 rated for above-ground, H4 for ground contact), naturally oily hardwoods, or weather-sealed native timbers.
  • Outdoor Fabrics: Standard printed polyester cushions fade and degrade under direct sunlight within months. Look for solution-dyed acrylic or olefin fabrics treated for UV resistance and mildew protection, or store cushions in a weatherproof storage bench when not in use.
  • Metal Finishes: Untreated steel rusts quickly in outdoor settings. Choose powder-coated aluminium—which is naturally rust-proof and lightweight—or hot-dip galvanised steel for frames, planter stands, and furniture legs.

Planning for Long-Term Outdoor Living

Starting with a realistic DIY budget does not mean you have to sacrifice long-term ambition. Many homeowners begin with gravel bases, simple seating zones, and mobile barbecues, gradually upgrading to integrated outdoor kitchens, built-in cabinetry, and engineered pergolas as funds allow.

If you are planning an upgrade from a basic setup to a fully tailored entertaining area, consulting professional designers ensures your utilities, gas connections, and structural layouts are planned safely and efficiently. Reach out today to discuss how to plan an outdoor entertaining area that fits your lifestyle and long-term property goals.

Frequently Asked Questions

What is the most cost-effective ground cover for an outdoor seating area?

Compacted crushed gravel, such as decomposed granite or fine bluestone over a compacted roadbase and geotextile weed membrane, is generally the most cost-effective, long-lasting surface. It costs significantly less than timber decking or poured concrete, accommodates natural drainage, and creates a level, firm surface that keeps table and chair legs stable.

How can I add privacy to my backyard or patio without building an expensive fence?

The most budget-friendly privacy solutions include installing timber or metal trellis panels against existing boundaries, hanging weatherproof outdoor drapery from overhead beams, or planting clumping bamboo varieties or fast-growing screening hedges in large trough planters. Free-standing slatted timber privacy screens also block sightlines without requiring deep footing excavation or structural boundary permits.

Are DIY pallet furniture pieces safe and durable for long-term outdoor use?

Pallets can provide affordable temporary seating, but they require careful selection and treatment. Only use pallets stamped “HT” (Heat Treated) rather than “MB” (treated with Methyl Bromide, a toxic chemical). Because pallet timber is raw, untreated softwood, it must be thoroughly sanded, primed with an exterior-grade timber preservative, and painted or sealed; otherwise, it will rot, splinter, and warp quickly when exposed to rain and soil moisture.

What are the best low-cost shade options for hot climates?

High-density polyethylene (HDPE) shade sails provide the highest level of UV blockage and airflow per dollar spent, preventing heat from getting trapped underneath. A quality market umbrella with a weighted base is another economical, movable option. For natural cooling, a wire cable trellis paired with fast-growing deciduous vines can significantly drop ambient temperatures around patio doors during summer.

How can I set up an outdoor cooking or BBQ zone on a limited budget?

Begin with a sturdy, freestanding gas or charcoal barbecue paired with a weather-resistant prep trolley or stainless steel commercial worktable rather than custom masonry cabinetry. Ensure the cooking zone is placed on a non-combustible surface like gravel or concrete pavers, away from overhead branches and vinyl siding, and maintain adequate clearance for prep tools, food trays, and fire safety equipment.

What outdoor improvements can renters make that are completely reversible?

Renters can dramatically transform outdoor spaces using interlocking composite or acacia deck tiles that lay directly over worn concrete without adhesive. Other reversible additions include freestanding cantilever umbrellas, vertical pocket planters hung from existing hooks, plug-in festoon lighting, outdoor rugs made from recycled UV-stabilised plastic, and mobile modular furniture that packs down easily at move-out.

Creating a new outdoor space for all seasons (even this one)

A genuinely functional all-season outdoor kitchen requires more than moving a freestanding barbecue beneath a verandah. Designing an entertaining space that performs reliably through torrential winter rain, salt-laden coastal humidity, and scorching summer heat depends on four integrated pillars: engineered overhead shelter, resilient non-porous materials, dedicated mechanical ventilation, and targeted zone climate control. When these elements are coordinated during the initial planning stages, your alfresco area transitions seamlessly from an occasional summer retreat into a high-utility extension of your living home year-round.

Designing for Year-Round Climate Resilience

Positioning and structural shelter dictate how often an outdoor kitchen can be used during adverse weather. A space exposed to unchecked prevailing winds quickly becomes uncomfortable in autumn and winter, while an unshaded western orientation makes midsummer cooking intolerable. Evaluating microclimates across your property is the critical first step in layout planning.

Effective spatial design combines solid structural protection with dynamic perimeter barriers:

  • Overhead shelter: Insulated panel roofing prevents heat transference during peak summer heat while eliminating condensation buildup on chilly winter evenings. Motorised, sensor-driven louvred pergolas provide flexibility, allowing winter sunlight to penetrate deep into living zones while sealing automatically upon detecting rainfall.
  • Wind deflection: Identifying winter wind directions allows for strategic placement of structural boundary walls, privacy screens, or outdoor cabinetry banks to buffer the primary dining and cooking zones.
  • Track-guided perimeter blinds: Heavy-duty, track-guided café blinds or clear PVC screens enclose the perimeter in moments. By creating an air buffer, they retain ambient warmth generated by radiant heaters and keep horizontal driving rain off cabinetry and appliances.

Selecting Durable, Weatherproof Materials

Indoor kitchen materials deteriorate rapidly outside. Intense ultraviolet radiation degrades standard resin binders, while ambient moisture causes porous stones and timber substrates to expand, rot, or delaminate. Specifying exterior-grade substrates ensures longevity and preserves visual finish.

For horizontal prep areas, sintered compact surfaces (such as ultra-compact porcelain) and natural dense granites offer superior durability. Engineered quartz containing polyester resins should be avoided in uncovered or partially covered installations, as direct UV exposure causes yellowing, hazing, and surface cracking. Sintered stone is non-porous, thermal-shock resistant, and completely impervious to hot pans, liquid spills, and ultraviolet rays.

Cabinet carcasses and doors demand materials impervious to moisture. Exterior-grade compact laminate, made from thermosetting resin-impregnated kraft paper compressed under immense pressure, creates a dense, waterproof core that resists rot, swelling, and fungal growth. Marine-grade polymer boards and powder-coated aluminium framing offer similarly robust alternatives. For appliances, handles, and hardware, insist on marine-grade 316 stainless steel, particularly in coastal zones. Grade 304 stainless steel, while common, remains vulnerable to cosmetic pitting and brown surface discolouration (tea staining) when exposed to ocean air or damp winter conditions.

Heating, Cooling, and Comfort Controls

Maintaining a comfortable ambient temperature requires different heating and cooling physics than an enclosed indoor room. Convection heating, which relies on warming the surrounding air mass, fails outdoors because rising warm air quickly dissipates into the open atmosphere.

Electric infrared radiant heaters are the most efficient method for winter warmth. Infrared waves heat people and physical surfaces directly rather than trying to warm moving air. Modern medium-wave or long-wave strip heaters mount unobtrusively to ceiling rafters or walls, providing instantaneous, glare-free heat directly focused over food preparation and seating areas. When paired with track-guided weather blinds, radiant heating establishes a microclimate that retains warmth even on freezing nights.

For summer conditions, high-volume outdoor ceiling fans rated for wet and damp locations keep air circulating beneath insulated roofs. Continuous airflow creates an evaporative cooling effect on the skin while forming an effective physical deterrent against flying insects and mosquitoes. Complementing these active climate controls with warm-spectrum LED task lighting (around 2700K to 3000K) ensures functional visibility over the grill while maintaining a relaxed, welcoming ambience.

Ventilation and Safety Under Cover

Enclosing an outdoor kitchen introduces rigorous safety obligations under Australian gas safety standard AS/NZS 5601. High-output gas burners and charcoal barbecues generate immense heat, airborne grease, and lethal combustion byproducts, including carbon monoxide. Operating these cooking appliances beneath a roofline without adequate airflow creates severe fire hazards and rapid indoor air contamination.

Whenever a barbecue is installed beneath a fixed roof or within a semi-enclosed perimeter, a specialised outdoor rangehood is mandatory. Standard domestic indoor rangehoods are insufficient; their motors lack the volume capacity to handle open-flame cooking, and their chassis are vulnerable to corrosion. Outdoor rangehoods require:

  • High extraction capacity: Airflow ratings between 2000 and 3000 cubic metres per hour (m³/hr) to pull heavy plume, grease, and smoke rapidly away from the cooking surface.
  • Deep extraction canopy: Overhanging capture hoods that cover the full front-to-back depth of the grill, catching rising thermal plumes before ambient breezes disperse them across the ceiling.
  • Non-combustible clearances: Strict separation distances between hotplates and combustible structural framing, typically requiring fire-retardant backing boards or minimum clearances to timber soffits and cabinetry.

Contact the Pyro Designs team to start designing your dream outdoor kitchen today.

Frequently Asked Questions

Can you install an outdoor kitchen without a permanent roof overhead?

Yes, but it requires careful selection of fully weather-sealed appliances, marine-grade cabinetry, and covers to protect cooking surfaces from rain and debris. Without overhead shelter, seasonal usability drops significantly during midwinter rain and midsummer midday heat, while appliances experience accelerated wear from exposure to the elements.

Do outdoor gas barbecues require a specialised rangehood under a pergola or verandah?

If your alfresco space is covered by an overhead roof and enclosed on more than two sides, Australian gas regulations typically treat the space as semi-enclosed, necessitating dedicated high-capacity mechanical extraction. An outdoor-rated rangehood with a minimum capacity of 2000 m³/hr captures intense grease and carbon monoxide that would otherwise stain ceilings, ignite, or create health hazards.

Which outdoor heater type is most effective for an open alfresco entertaining area?

Infrared electric strip heaters are the most effective because they warm objects, furniture, and people directly through radiant energy. Unlike gas mushroom or convection heaters, which attempt to warm the air and lose their effectiveness as soon as a breeze passes through, infrared heat remains stable and energy-efficient in open and semi-enclosed environments.

How do you prevent outdoor kitchen plumbing from freezing or deteriorating in colder months?

In regions susceptible to sub-zero winter temperatures, plumbing should be installed with an isolating ball valve and low-point drain cock to empty water lines before major frosts. Insulating all exposed supply pipework with closed-cell foam lagging protects copper and PEX lines from freezing, expanding, and splitting.

What benchtop materials are least prone to cracking or fading under direct sunlight?

Sintered compact stone (porcelain) and high-density natural granites are the most UV-stable materials available for outdoor benchtops. They contain mineral components that withstand extreme thermal fluctuations without expanding, scorching, or yellowing, unlike standard engineered quartz surfaces bound with polymer resins.

Do you need council approval to build an outdoor kitchen with integrated services?

A freestanding outdoor kitchen bench placed on an existing compliant slab may not require approval, but adding permanent roof structures, structural gas tie-ins, upgraded sub-boards, or sewer-connected drainage often triggers local planning and building permit requirements. Checking local council planning policies and using licensed trades ensures all electrical, plumbing, and gas work complies with regulatory certifications.

do the alfresco thing

do the alfresco thing

The Weather’s So Nice Ads Transcript

“Yep, ok. Out you all go. I’m fine – off you all go, do the alfresco thing. Cause it’s so amazing to be outside. Every flamin’ night. Oh, we had it custom made! We even chose the benchtops and sink. La-di-dah, we even have an ice maker. And don’t forget he made to measure smoker! You can just ignore me then, I guess.” Where I’ve always been.” Make your indoor kitchen jealous. For primo alfresco, choose Pyro – Perth’s finest custom made outdoor kitchens. See wordpress-1344038-5347084.cloudwaysapps.com.

$5000 Off!*

*Order before 15th June 2019 for your chance to win

$5000 off your new Alfresco kitchen!

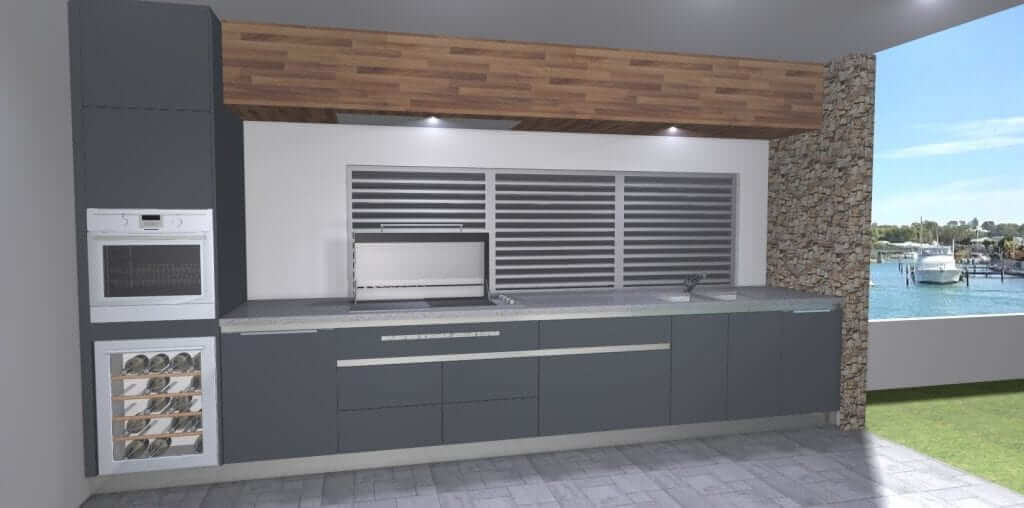
Alfresco Kitchen water side

$5000 cash back prize draw!

Purchase your new alfresco kitchen to enter the price draw for your chance to win $5000 cash back.

Offer ends on June 15th  so get in quick to secure your place in our exciting promotion!

*Terms and conditions apply


Alfresco kitchen concept to completion

Delivering an alfresco kitchen concept to completion depends on design complexity, material lead times, and required trade rough-ins. In coastal Western Australia locations such as Halls Head, the build demands more than cosmetic styling. It requires rigorous site viability assessments, compliance with Australian gas safety standards for semi-enclosed spaces, marine-grade material specification, and sequenced coordination between licensed trades. This project breakdown details how an initial design brief transitions into a functional, enduring outdoor kitchen.

Pre-Design Site Viability and Structural Checks

Before committing to cabinetry layouts, a thorough technical inspection of the existing outdoor area is essential. Establishing the baseline capacity of your patio prevents costly structural modifications mid-build.

  • Slab drainage and falls: Concrete slabs and paved alfresco areas are purposefully laid with a drainage gradient, usually between 1:60 and 1:100, to direct rainwater away from the home. Cabinetry cannot simply sit flat on an angled surface. The project surveyor must measure the fall across the entire footprint to determine whether adjustable marine-grade plinth legs, custom-scribed sub-frames, or localised floor levelling compounds will be needed to ensure plumb carcasses and level benchtops.
  • Electrical switchboard capacity: Modern outdoor culinary hubs require dedicated circuits. High-output outdoor rangehoods, under-bench beverage centres, dedicated barbecue rotisseries, and integrated strip lighting quickly consume capacity. An electrical audit confirms whether existing sub-boards can support the additional amp draw or if direct runs back to the main switchboard are necessary.
  • Gas line sizing and delivery pressures: Upgrading from a portable bottle to a continuous-run natural gas or reticulated LPG built-in barbecue demands adequate Megajoule (MJ/h) delivery. Long pipe runs from the gas metre to an outdoor patio can experience pressure drops if the copper line diameter is undersized, starving the appliance under full load.
  • Ceiling clearances and duct exit routes: Installing overhead extraction requires checking roof cavity access, truss positioning, and the exterior roof cover. The rangehood flue must exhaust outdoors via rigid ducting without structural interference from timber rafters, steel beams, or downpipes.

Spatial Planning and Workflow Zoning

Designing an alfresco kitchen starts with hand sketches that develop into precise 3D CAD renders. The objective is to achieve ergonomic indoor workflow within the practical boundaries of an outdoor footprint. For genuine functional ease, the design relies on four primary spatial zones:

  • The cooking zone: The barbecue serves as the central workstation. It requires generous landing space on either side, ideally at least 400 mm of heat-resistant benchtop, providing safe resting zones for raw prep trays on one side and hot serving dishes on the other.
  • The refrigeration zone: Locating the bar fridge toward the outer edge of the cabinetry run allows guests to retrieve chilled beverages without entering the primary cooking zone or crowding the chef.
  • The prep and wet zone: Placing the sink and food preparation area between the refrigeration and cooking zones creates an intuitive line of movement, minimising wasted steps during prep and wash-up.
  • Traffic clearances: Walkways between the cabinetry run and outdoor dining tables or lounge furniture must maintain a minimum width of 900 mm, with 1100 mm to 1200 mm preferred to permit seamless cabinet door opening and unhindered traffic flow.

Material Specification for Coastal Alfresco Durability

Standard interior materials fail rapidly outdoors. Airborne salt spray, solar UV radiation, and seasonal humidity cycle through extreme ranges, causing wood-based composites to swell and low-grade metals to pit. Durability requires exterior-engineered components.

Cabinetry Substrates: Compact Laminate vs. Polymer Boards

Internal carcasses must be constructed using impervious materials rather than standard moisture-resistant (MR) MDF or particleboard. High-pressure compact laminate (typically 13 mm thick) consists of thermosetting resins reinforced with cellulose fibres under intense heat and pressure. It is completely waterproof, self-supporting, and highly resistant to impact. Alternatively, expanded polymer composite boards or marine-grade aluminium framing systems provide zero-swelling alternatives that are immune to rot, termite damage, and moisture absorption. For long-term peace of mind, custom outdoor cabinetry should always employ 316-grade stainless steel hardware, hinges, and drawer runners to prevent seizing in coastal environments.

Benchtops: Sintered Stone and Exterior Granite

Selecting durable alfresco benchtops requires materials that resist ultraviolet radiation, scratching, and intense thermal shock. Sintered stone surfaces are manufactured through mineral compaction under extreme pressure and heat, creating a non-porous slab that will not yellow, warp, or scorch when positioned directly adjacent to open grills. Dense, unpolished or flamed natural granites also perform exceptionally well. In contrast, standard indoor engineered quartz contains polymer resins that break down under UV sunlight, leading to discoloration and hairline stress fractures over time.

Gas Safety, Ventilation, and Appliance Integration

Selecting and fitting out outdoor appliances involves strict compliance checks, particularly when working within covered or partially enclosed patio structures.

Gas Compliance in Semi-Enclosed Spaces

Under Australian gas installation standards (AS/NZS 5601), an outdoor area is considered enclosed if it does not meet strict natural cross-ventilation thresholds. If a patio features solid boundary walls, drop-down cafe blinds, or fixed screening that restrict open airflow, a standard outdoor barbecue cannot legally or safely operate without adequate permanent ventilation openings. Carcass interiors housing gas connections must also incorporate low-level and high-level cut-outs to prevent gas pooling if an unignited burner is left open.

Overhead Mechanical Extraction

In sheltered alfresco areas, high-capacity mechanical extraction is essential to prevent grease films, soot, and smoke from staining ceiling linings. Outdoor rangehoods demand robust airflow rates, generally between 2,000 and 3,000 cubic metres per hour, paired with commercial-style stainless steel baffle filters. The exhaust duct must run via rigid, fire-safe metal piping directly through the roof cover, terminated with an external roof cowl or wall vent fitted with backdraft dampers to stop wind and pests entering the duct.

Front-Venting Refrigeration

Domestic indoor refrigerators pull air from the back or sides, which leads to overheating and compressor failure when sealed inside tight cabinetry cavities. Outdoor-rated beverage units use front-breathing refrigeration. Air is drawn in through one side of the lower kickplate grille and expelled out the other. Cabinetry must feature laser-cut kickboard vents and rear ventilation gaps to protect the motor during high-temperature summer days.

Typical Project Timeline and Stage Breakdown

Delivering a custom alfresco kitchen proceeds through five structured stages to ensure seamless trade integration:

  1. Design and engineering (Weeks 1 to 2): Site measurements are converted into working CAD drawings. Appliance specifications, electrical layouts, and gas loads are finalised, and structural viability checks are confirmed.
  2. Service rough-ins (Weeks 3 to 4): Licensed trades attend the site before cabinetry fabrication begins. Electricians pull cable for high-amp rangehoods, fridge points, and lighting. Plumbers run water lines, PVC drainage, and appropriately sized gas piping to the exact design coordinates.
  3. Cabinetry fabrication and carcass install (Weeks 5 to 7): Cabinetry is manufactured using CNC precision cutting. On site, the carcasses are mechanically anchored, laser-levelled to counter slab falls, and sealed against weather exposure.
  4. Benchtop templating and fabrication (Weeks 8 to 9): Once the cabinetry carcasses are fully secured on site, the stonemason captures physical or laser templates. Sintered stone and granite cannot be altered on site; cut-outs for barbecue drop-ins, sinks, and flush-mount power sockets are cut in the factory before final site delivery and bonding.
  5. Fit-off, appliance commissioning, and handover (Week 10): The final stage brings all trades back to site. Sinks, taps, barbecues, and rangehoods are installed and connected. Gas pressure lines are tested, electrical safety switches certified, drawer runners fine-tuned, and the completed alfresco area is thoroughly cleaned and handed over to the homeowner.

Ongoing Care and Coastal Salt Management

Outdoor kitchens situated within coastal zones require regular cleaning to prevent salt accumulation, surface staining, and galvanic corrosion.

  • Protecting stainless steel against tea-staining: Even marine-grade 316 stainless steel can develop brown surface discoloration, known as tea-staining, when salt deposits trap moisture on unwashed metal. Wipe barbecue hoods, fascia panels, and rangehood surfaces every fortnight with fresh warm water and a neutral detergent, followed by a light application of a specialised stainless steel protectant. Avoid abrasive steel-wool pads, which introduce free iron particles that accelerate rust.
  • Maintaining sintered stone and granite: Wipe down sintered stone benchtops after each cooking session using warm water and a microfibre cloth. Grease splashes break down easily with standard pH-neutral degreasers. If unsealed natural granite is installed, reapply a quality penetrating stone sealer every twelve to eighteen months to block oil and acid absorption.
  • Cabinetry seals and tracks: Inspect kickplates, door seals, and drawer runners twice a year. Vacuum loose sand and coastal debris out of bottom tracks and apply a dry silicone-based lubricant to hinges and slides to ensure smooth, snag-free movement.

Planning an outdoor kitchen project tailored to your space, lifestyle, and local environment starts with sound advice. Contact the Pyro Designs team to explore design concepts, material samples, and installation schedules for your home.

Frequently Asked Questions

How long does an alfresco kitchen take from concept design to completion?

A custom alfresco kitchen typically takes between six and twelve weeks from the initial design consultation to final trade handover. This duration includes concept design, preliminary trade rough-ins, off-site cabinetry fabrication, precision benchtop templating, and final appliance commissioning.

Do you need council approval to install an outdoor kitchen in Western Australia?

An outdoor kitchen installed entirely beneath an existing, approved alfresco roof generally does not require planning permission or a separate building licence in Western Australia. However, if your project involves building a new patio structure, extending the existing roofline, modifying load-bearing columns, or carrying out major structural brickwork, council approval is legally required before construction begins.

Can an outdoor kitchen be installed on an uneven or sloping concrete patio?

Yes. Outdoor concrete slabs are designed with deliberate drainage falls to shed rainwater, meaning they are rarely level. Cabinet makers accommodate this slope by using heavy-duty, height-adjustable plinth feet and scribed composite sub-bases, ensuring the cabinetry carcasses and stone benchtops sit perfectly level regardless of the floor angle.

Why can standard indoor quartz or engineered stone not be used outdoors?

Standard indoor quartz surfaces contain polyester resins that bind the crushed stone particles together. When exposed to external UV sunlight, these resins break down, causing the stone to yellow, lose its gloss, and develop micro-cracks under thermal heat from the sun and nearby cooking appliances.

What are the ventilation requirements for a barbecue located under a covered roof?

Australian gas safety standards (AS/NZS 5601) dictate that gas barbecues operated beneath covered outdoor areas must have adequate open perimeter ventilation to prevent dangerous carbon monoxide and gas accumulation. In semi-enclosed spaces with blinds or solid walls, a commercial-grade outdoor rangehood ducted directly to the outside air and fixed lower carcass venting are mandatory.

How often should an outdoor kitchen near the coast be cleaned to prevent rust?

In coastal zones located within a few kilometres of the ocean, exposed metal surfaces should be rinsed with fresh water and wiped down every two to four weeks. Regular washing removes airborne sea salt before it breaks down the chromium oxide layer on stainless steel appliances and causes tea-staining or pitting.